

In the ever-demanding world of education, teachers often find themselves bogged down with administrative tasks. From tracking attendance to managing assignment submissions, these duties can take away valuable time that could be spent on direct student engagement. Fortunately, integrating Google Sheets with ChatGPT through Zapier can help automate these tasks, allowing teachers to focus more on teaching. This blog post will guide you through the process of setting up this integration to streamline your administrative tasks.
Benefits of Automation
- Time Savings: Automate repetitive tasks, freeing up more time for teaching.
- Consistency: Ensure uniform data management and reporting.
- Efficiency: Quickly generate summaries, identify patterns, and suggest interventions.
Getting Started
To get started, you’ll need:
- A Google account with access to Google Sheets.
- A Zapier account (free plans available).
- Access to OpenAI’s ChatGPT (you may need API credentials).
Step-by-Step Guide
Step 1: Set Up Your Google Sheet
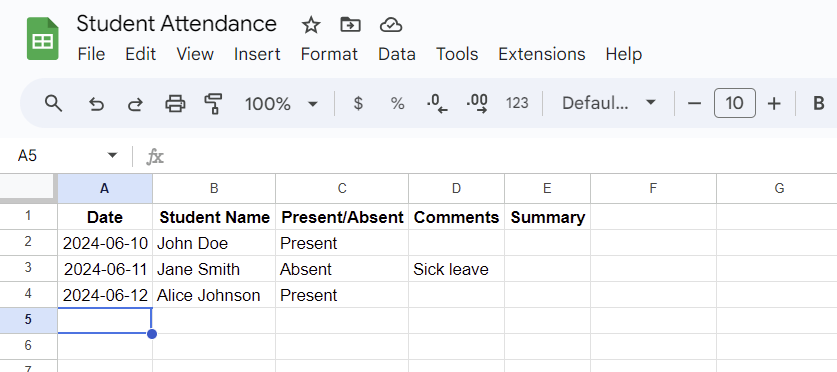
- Create a Google Sheet: Start by creating a new Google Sheet to track your administrative data. For this example, we’ll create a sheet to track student attendance.
- Structure Your Sheet: Organize your sheet with relevant columns such as Date, Student Name, Present/Absent, Comments.
Step 2: Create a New Zap in Zapier
- Log in to Zapier: Open Zapier and log in to your account.
- Create a New Zap: Click on the “Create Zap” button.
Step 3: Set Up Google Sheets Trigger
- Choose Google Sheets as the Trigger App: In the trigger step, search for and select Google Sheets.
- Select Trigger Event: Choose “New Spreadsheet Row” as the trigger event. This will activate the Zap every time a new row is added to your sheet.
- Connect Your Google Account: Connect your Google account to Zapier and select the specific Google Sheet and worksheet you want to use.
Step 4: Set Up ChatGPT Action
- Add an Action Step: Click on the “+” icon to add an action step.
- Choose OpenAI (ChatGPT) as the Action App: Search for and select OpenAI.
- Select Action Event: Choose “Send Prompt” as the action event.
- Customize the Prompt: Define what ChatGPT should do with the data from Google Sheets. For instance, if you want ChatGPT to generate a summary of attendance data, your prompt might look like this:

Step 5: Send Responses Back to Google Sheets
- Add Another Action Step: Click on the “+” icon again to add another action step.
- Select Google Sheets as the Action App: Choose Google Sheets and select “Update Spreadsheet Row” as the action event.
-
Map the Response Data: Map the response from ChatGPT back to the relevant column in your Google Sheet to record the generated summary or feedback.
Step 6: Test and Activate Your Zap
- Test Your Zap: Before activating, test the Zap to ensure everything works as expected. Add a new row to your Google Sheet and check if the corresponding response from ChatGPT is correctly populated.
- Activate Your Zap: Once you’re satisfied with the test, activate your Zap to start automating your administrative tasks.
Conclusion
By following these steps, you can seamlessly integrate Google Sheets with ChatGPT using Zapier, significantly reducing the time spent on administrative tasks. This automation not only saves time but also ensures consistent and efficient data management, allowing you to focus more on what matters most—teaching and engaging with your students. Try it out and see how it transforms your workflow!